XSKY CSI plugin for File Storage 1.0.0
Container Storage Interface (CSI) driver, provisioner, and attacher for XSKY ISCSI and NFS.
Overview
XSKY CSI plugins implement interfaces of CSI. It allows dynamically provisioning XSKY volumes (File storage) and attaching them to workloads. Current implementation of XSKY CSI plugins was tested in Kubernetes environment (requires Kubernetes 1.11+), but the code does not rely on any Kubernetes specific calls (WIP to make it k8s agnostic) and should be able to run with any CSI enabled CO.
Purpose of this article
Provide more details about configuration and deployment of Xsky File Storage driver Introduce usage of Xsky Block Storage driver. see examples below.
Before to go, you should have installed XSKY SDS
Get latest version of XSKY CSI driver at docker hub by running docker pull xskydriver/csi-nfs
Deployment
In this section,you will learn how to deploy the CSI driver and some necessary sidecar containers
Prepare cluster
| Cluster | version |
|---|---|
| Kubernetes | 1.13 + |
| XSKY SDS | 4.0+ |
Deploy CSI plugins
Install dependencies
Note:install these utils for all kubernetes node
generally, Nodes should have install mount tools
incase of they don’t, you can also install it by running
RedHat: yum install nfs-utils
Debian: apt install nfs-common
Plugins
Get yaml file
Get yaml file from below links:
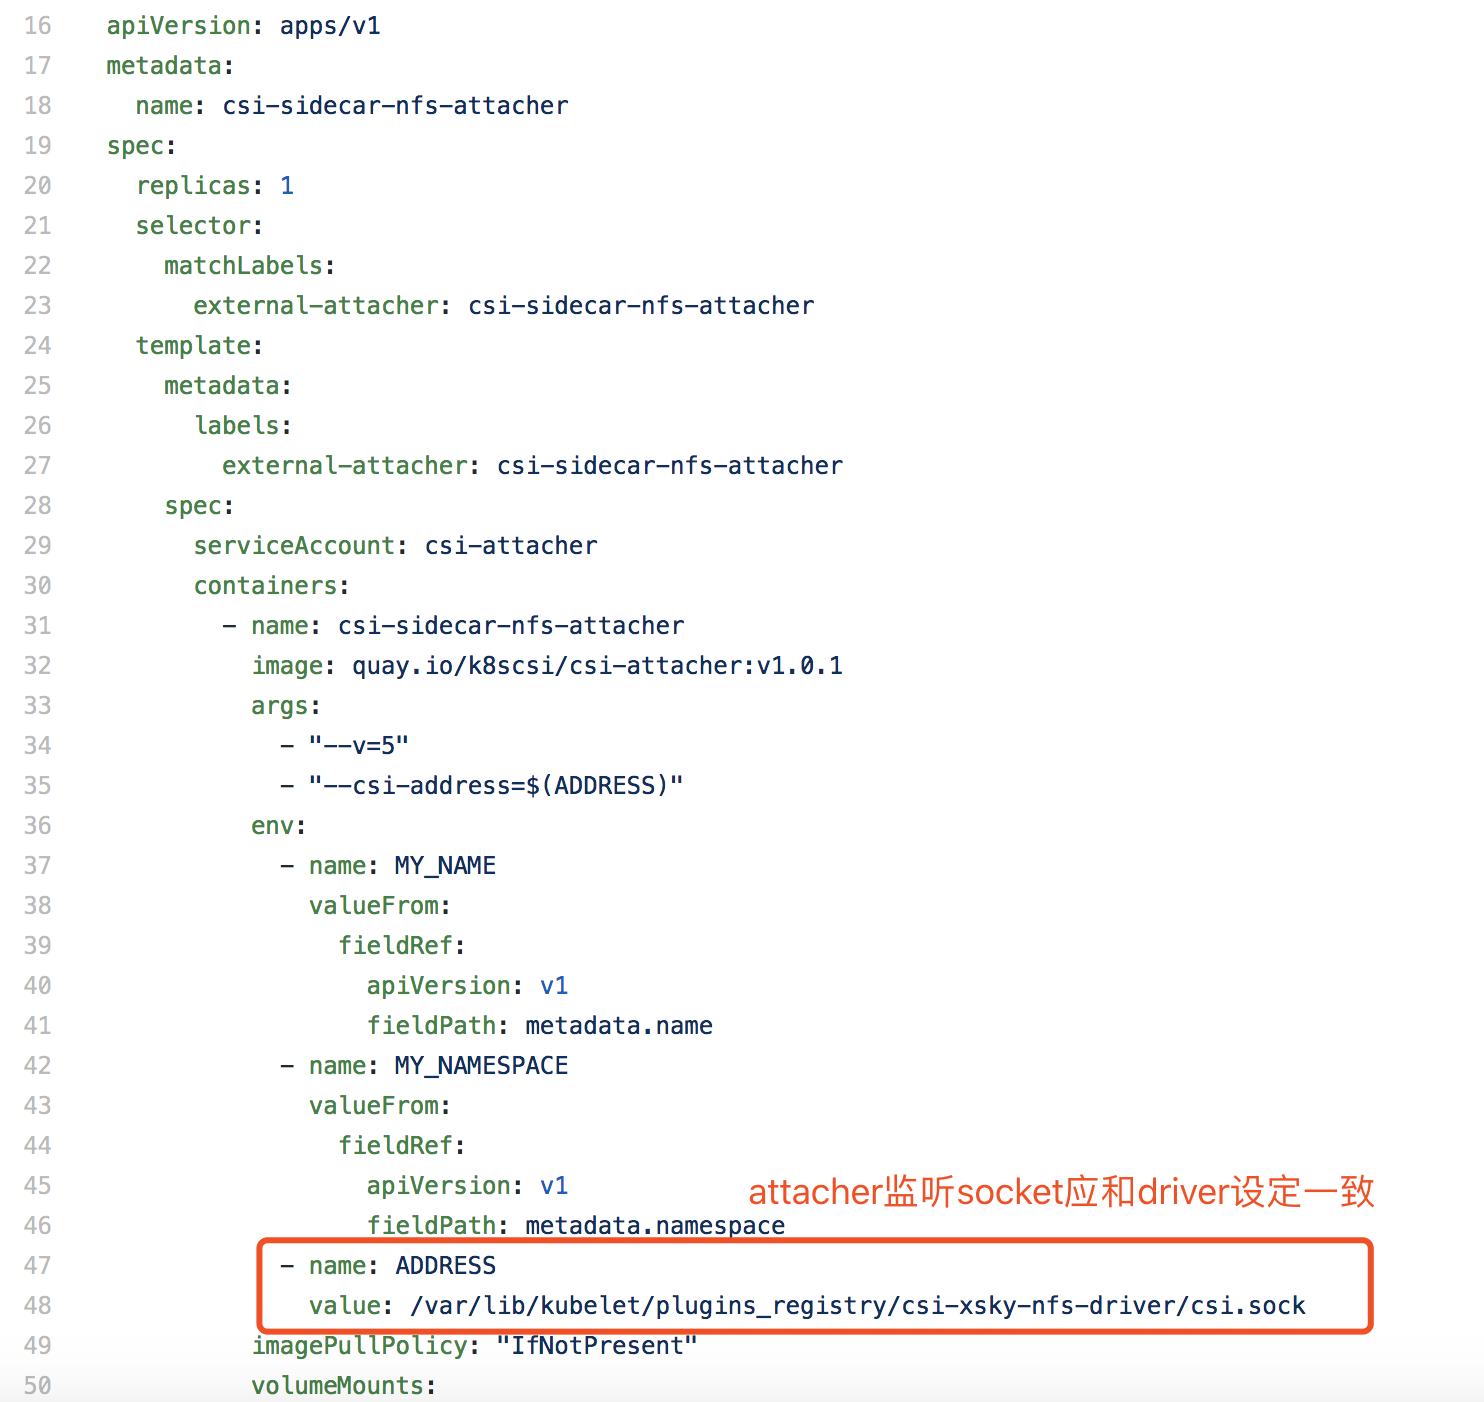
Remark on csi-nfs yaml
(csi-xsky-nfs-driver.yaml)
Usually, you dotn’t need to alter any configurations we provided , but you can still modify this yaml to setup the driver for some situation.
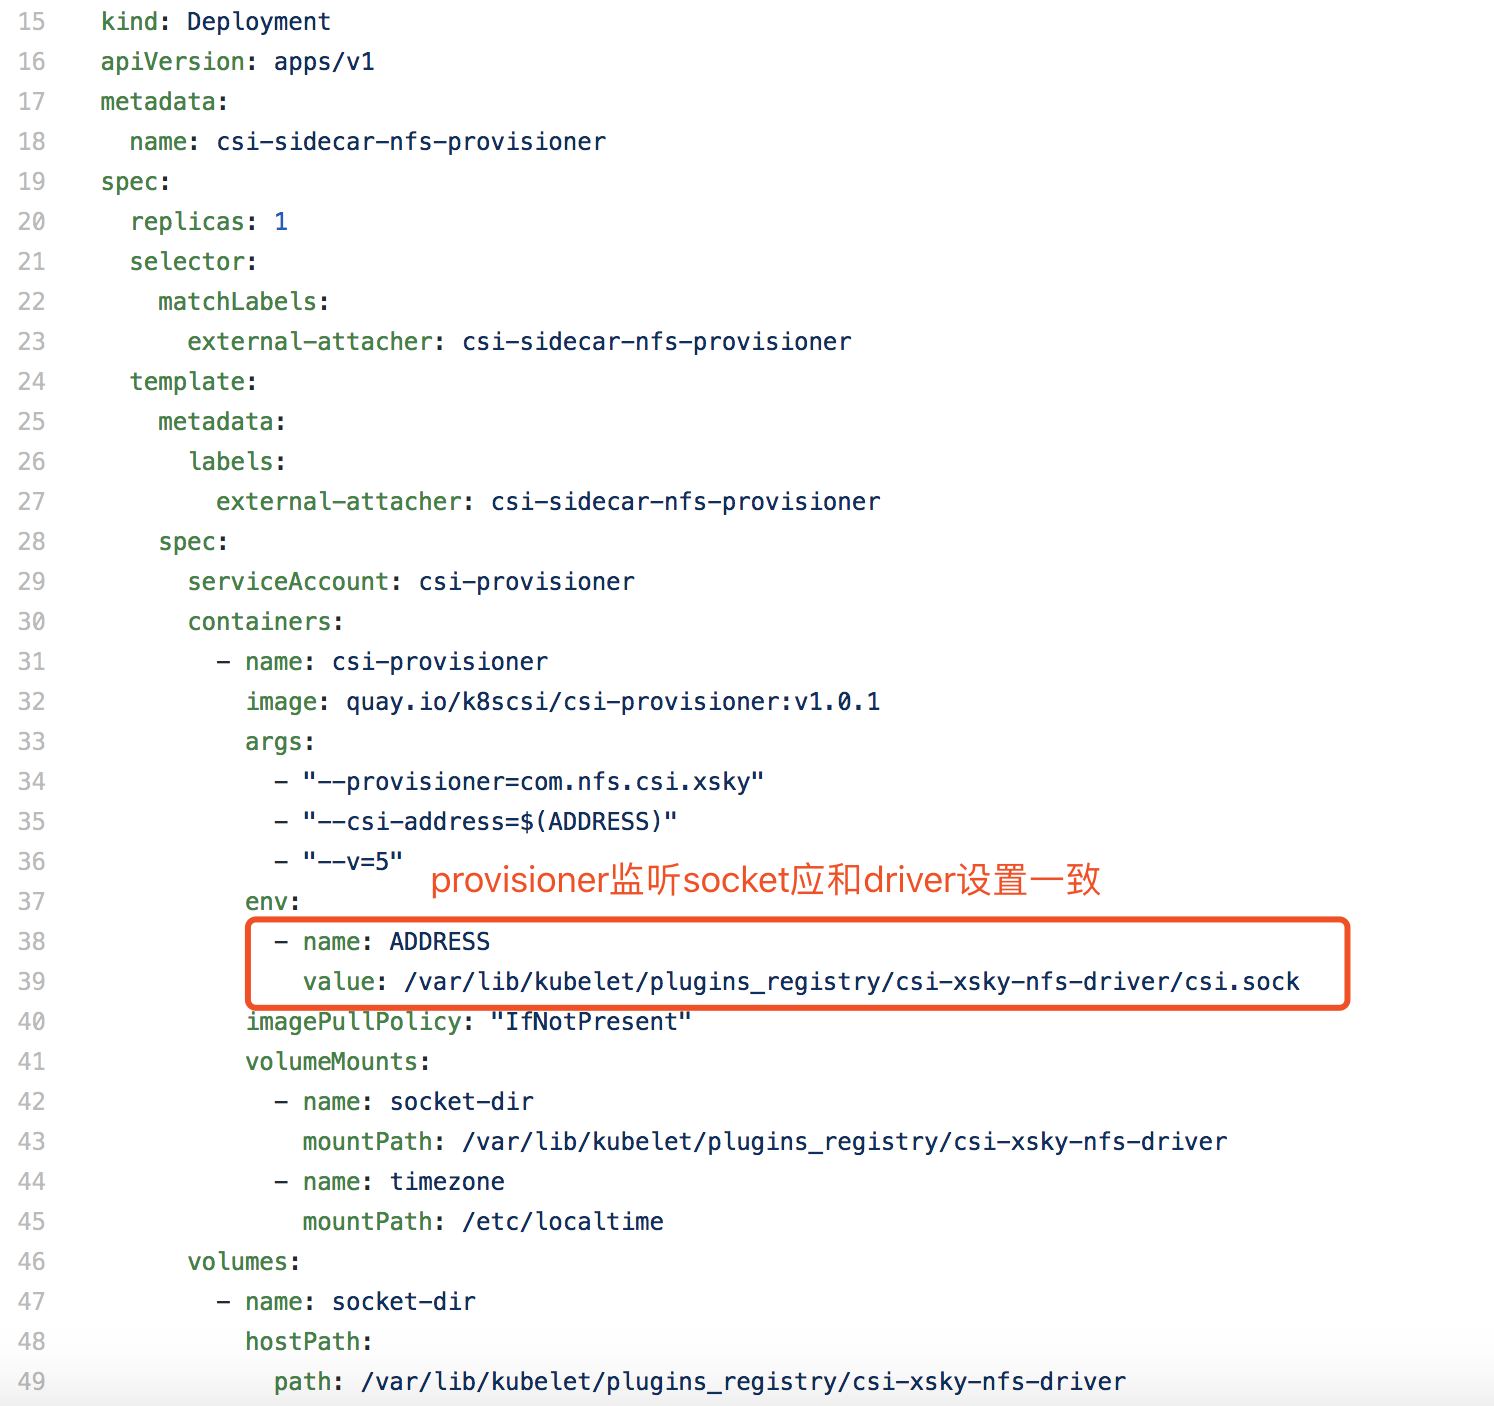
Remark on sidecar provisioner yaml
Usually, you should keep value in default
deploy sidecar(Helper container)& node plugin
-
Create RABCs for sidecar container and node plugins:
$ kubectl create -f csi-sidecar-nfs-attacher-rbac.yaml
$ kubectl create -f csi-sidecar-nfs-provisioner-rbac.yaml
$ kubectl create -f csi-xsky-nfs-driver-rbac.yaml
ignore the error if you have install xsky block driver . That error is acceptable.
-
Deploy CSI sidecar container:
$ kubectl create -f csi-sidecar-nfs-attacher.yaml $ kubectl create -f csi-sidecar-nfs-provisioner.yaml -
Deoloy XSKY-FS CSI driver:
$ kubectl create -f csi-xsky-nfs-driver.yaml -
To verfify:
$ kubectl get all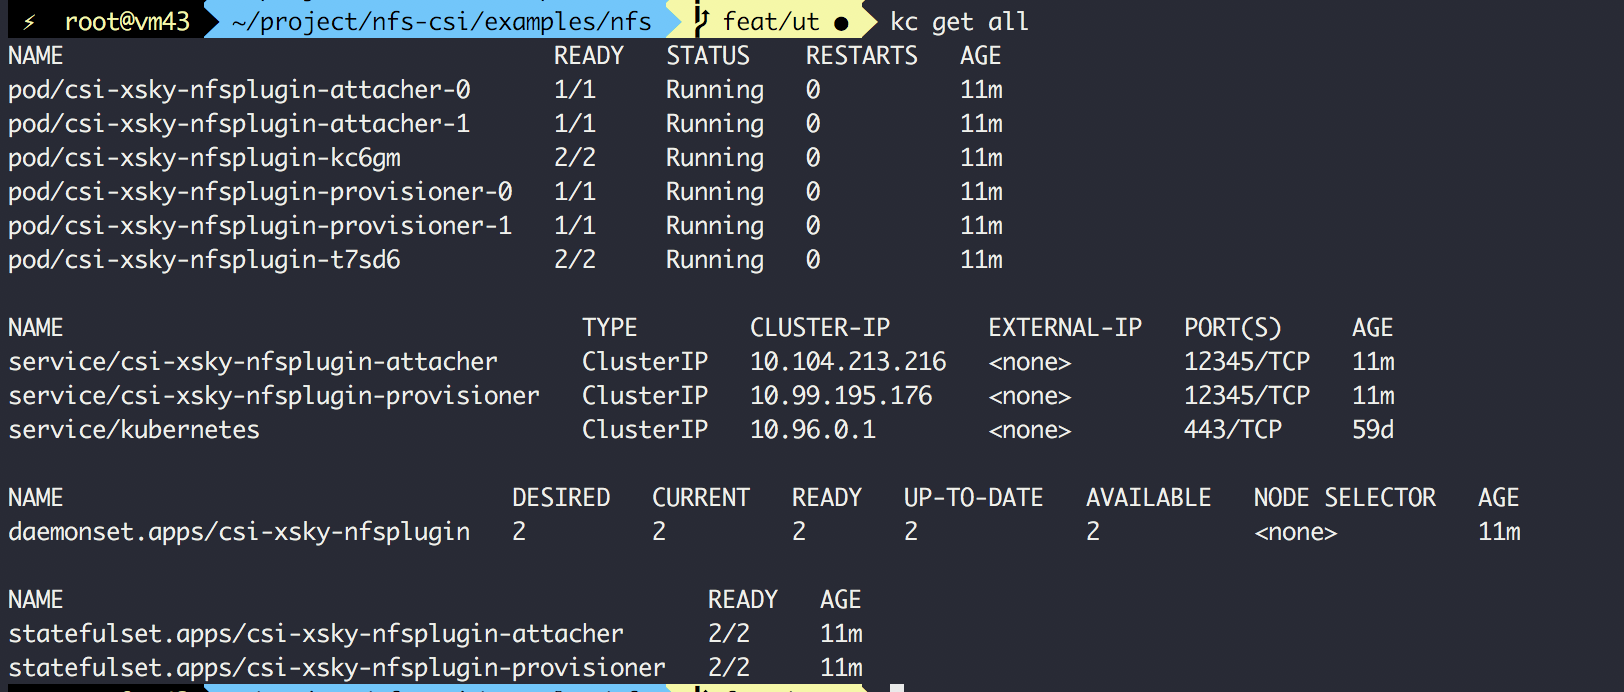
Congratulation to you, you have just finished the deployment. Now you can use them to provisioning XSKY block volume .
Usage
In this section,you will learn how to dynamic provision file storage with XSKY CSI driver. Here I will Assumes you have installed XSKY SDS Cluster.
Preparation
To continue,make sure you have finish the Deployment part.
Login to you SDS dashboard, your dashboard address should be http://your_domain.com/8056

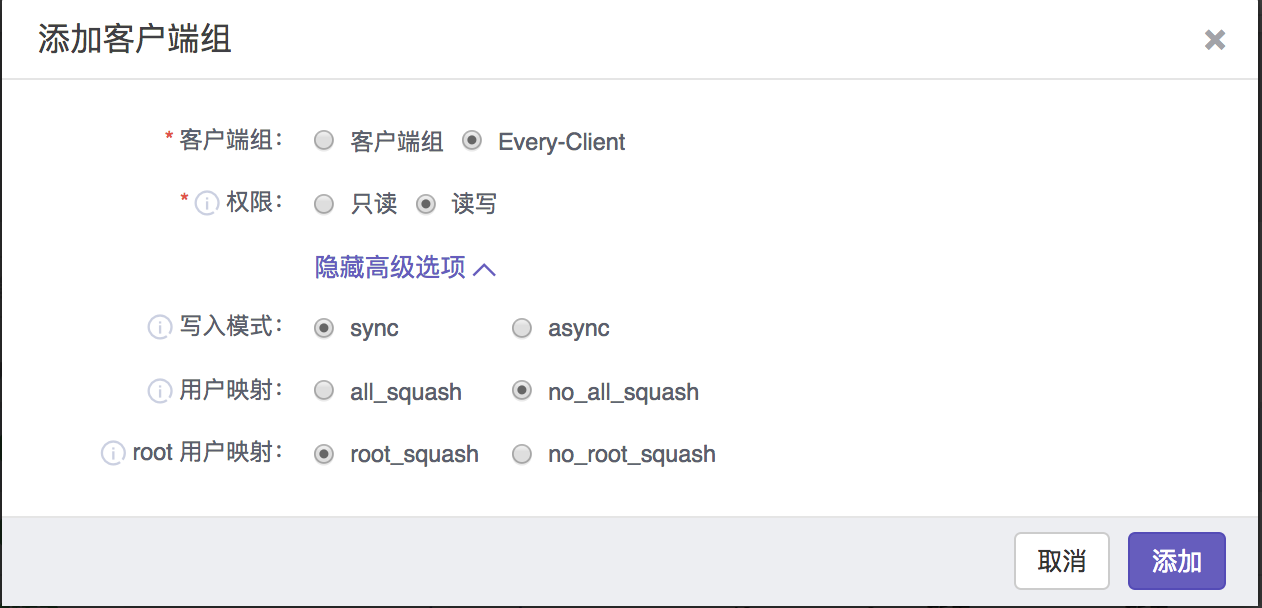
If use public share,you can skip this part
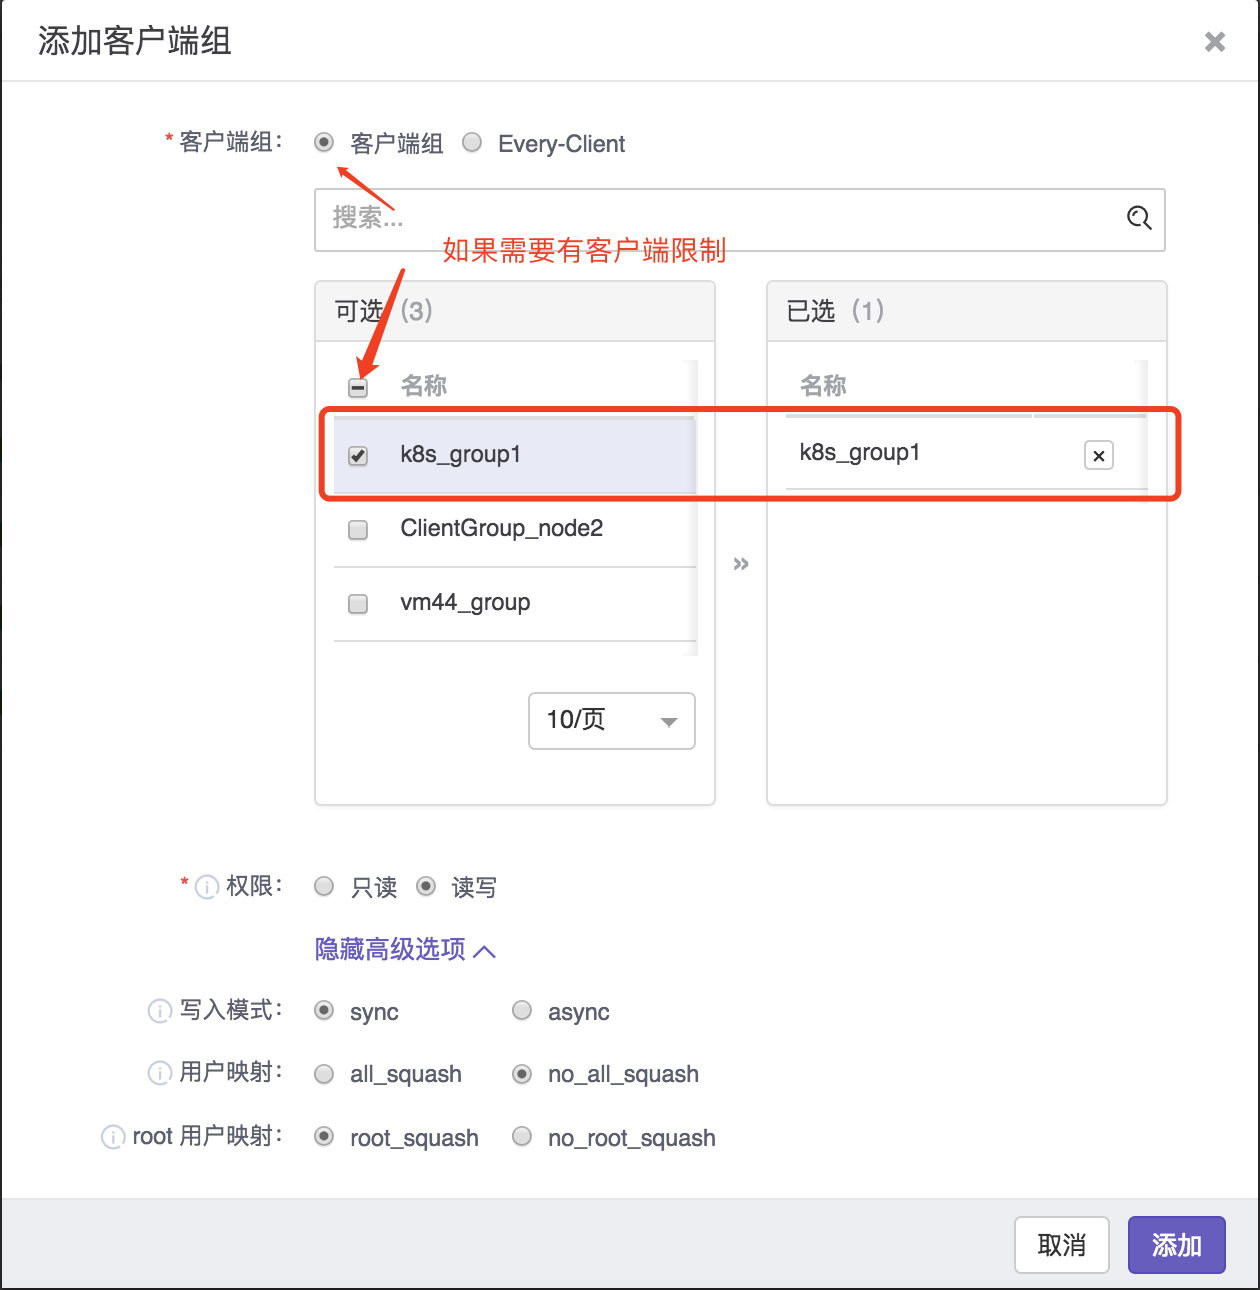
FS Client & Client Group
create fs client and add k8s-node

Continue to create client group and add k8s-client you just create to this group
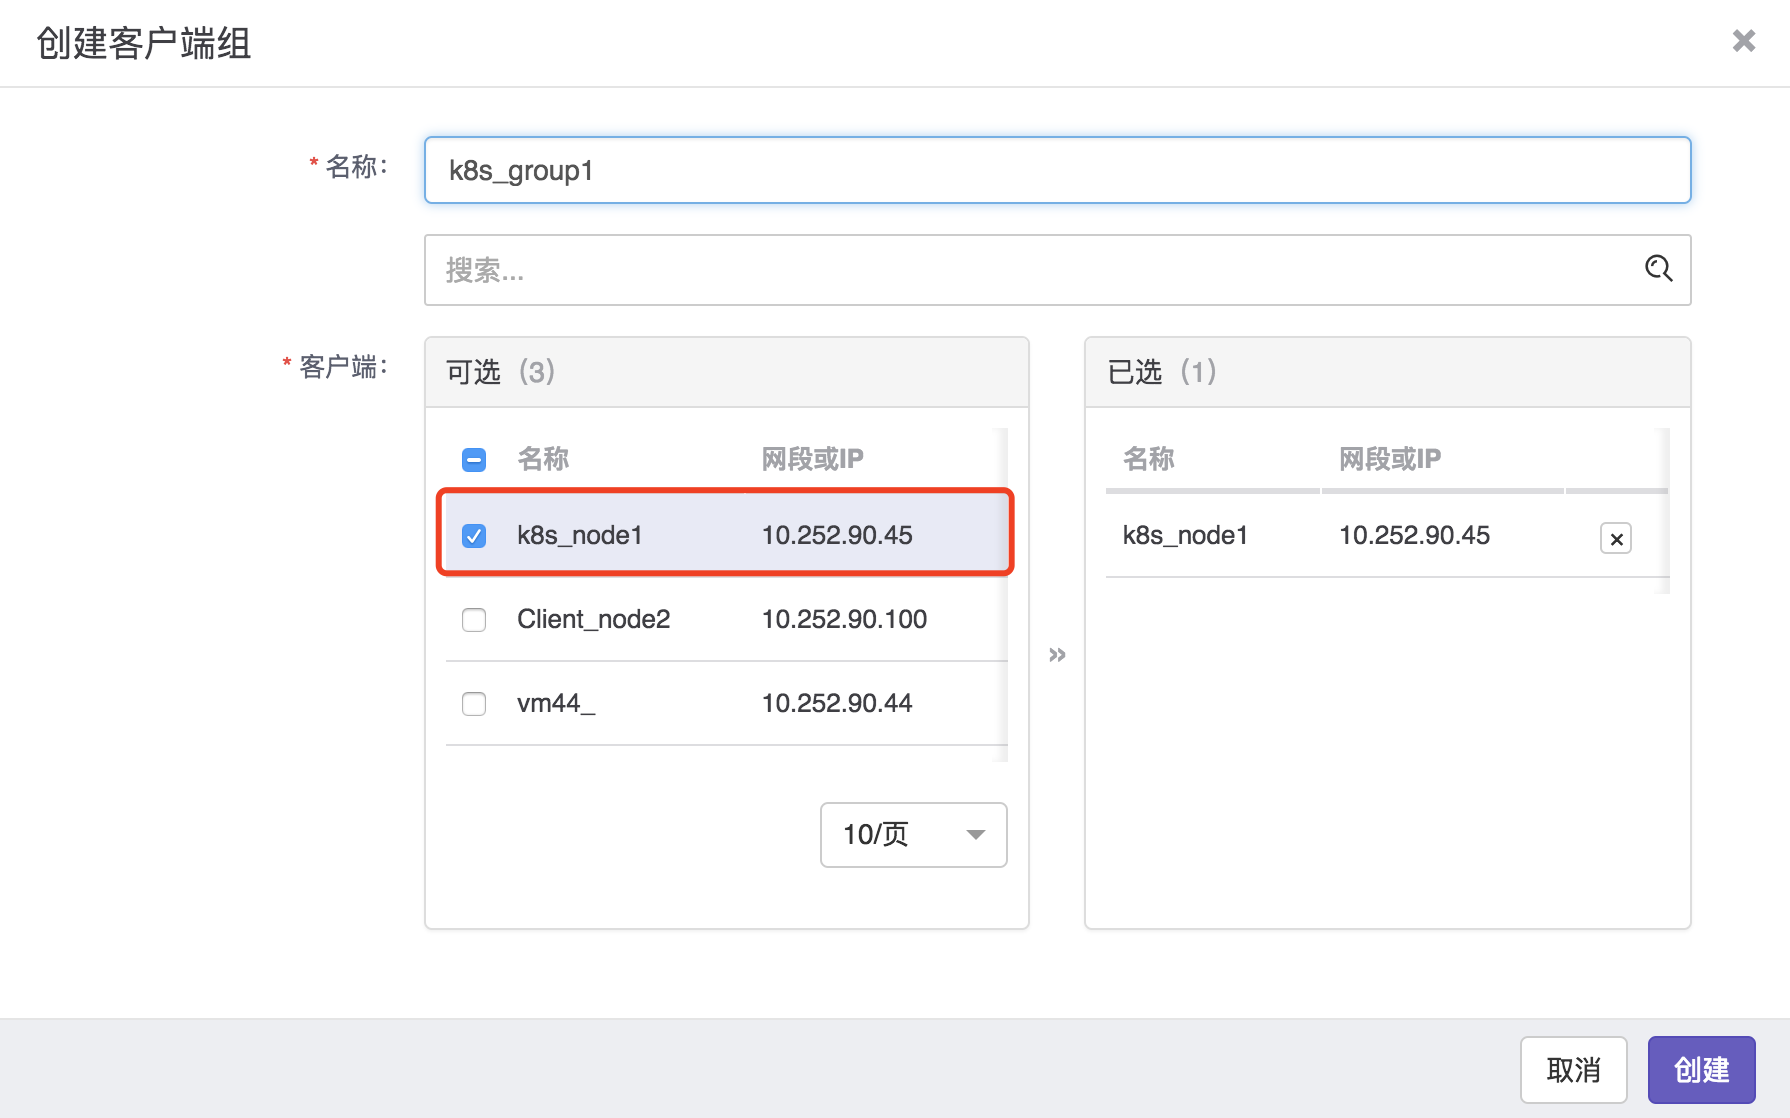

As show above, please record the client group name.
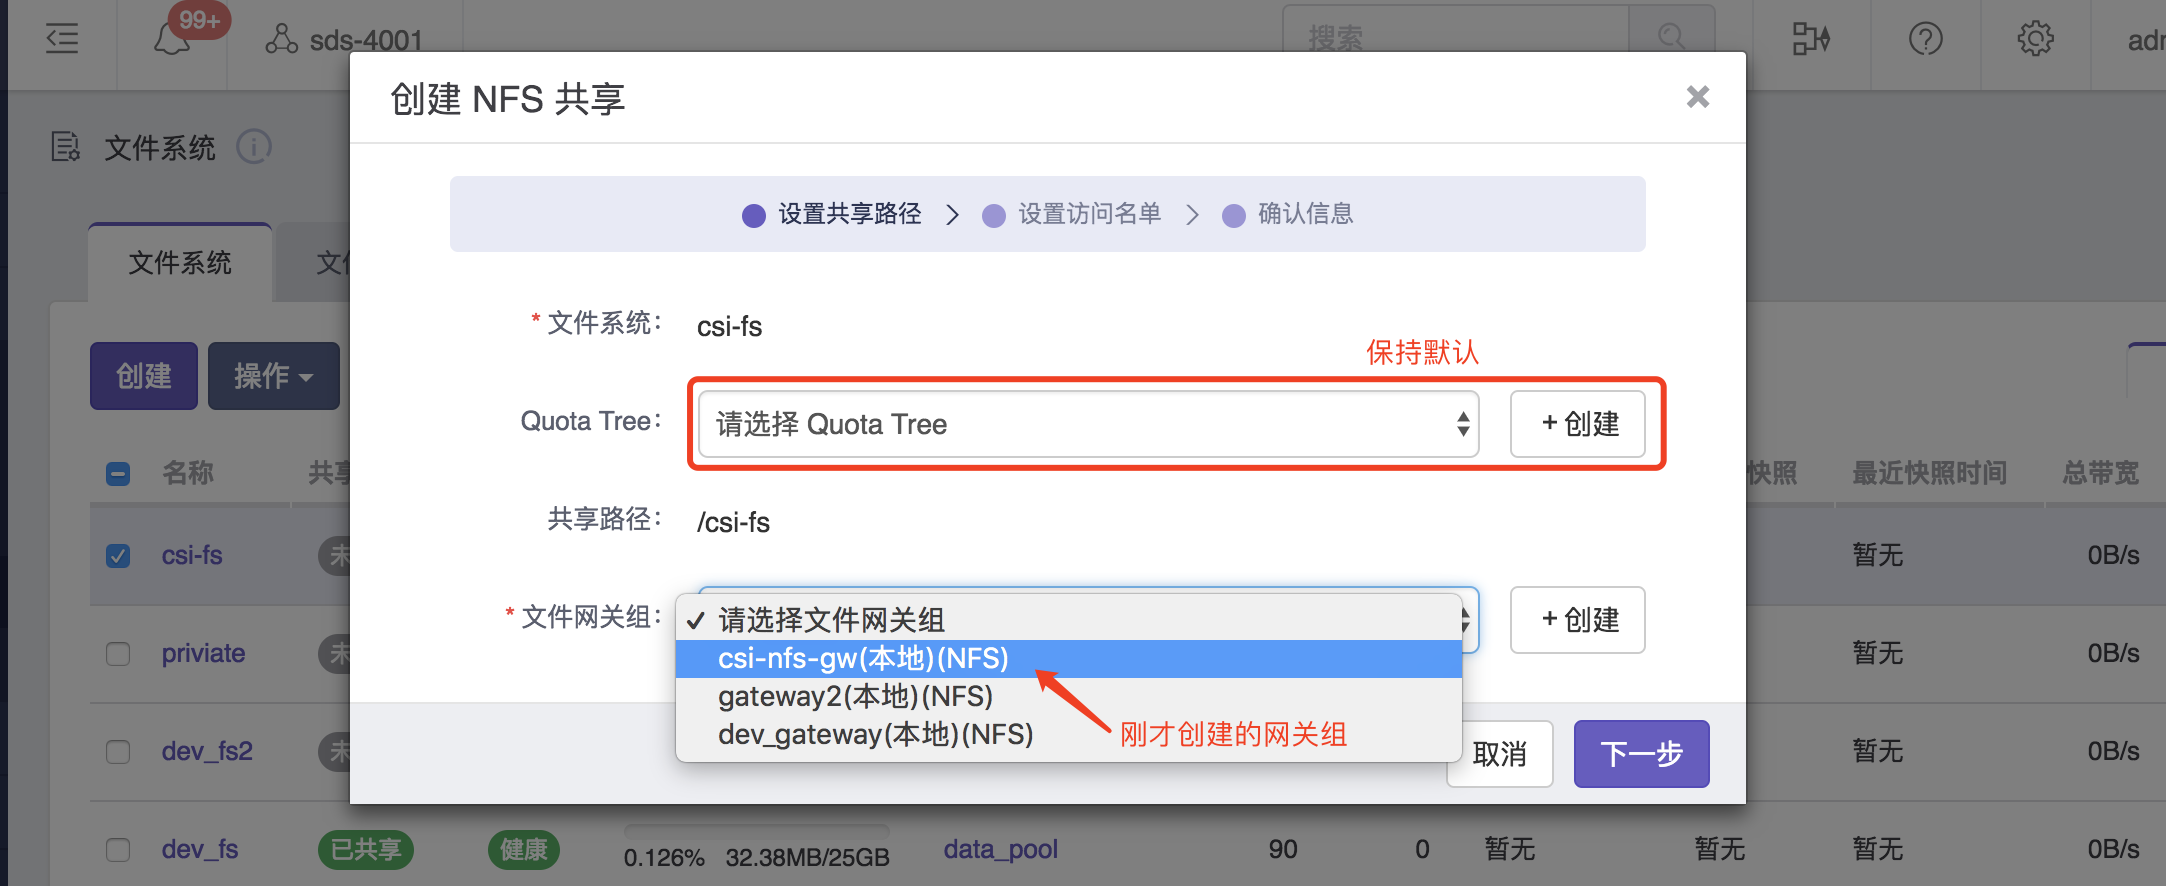
Create File Gateway Group
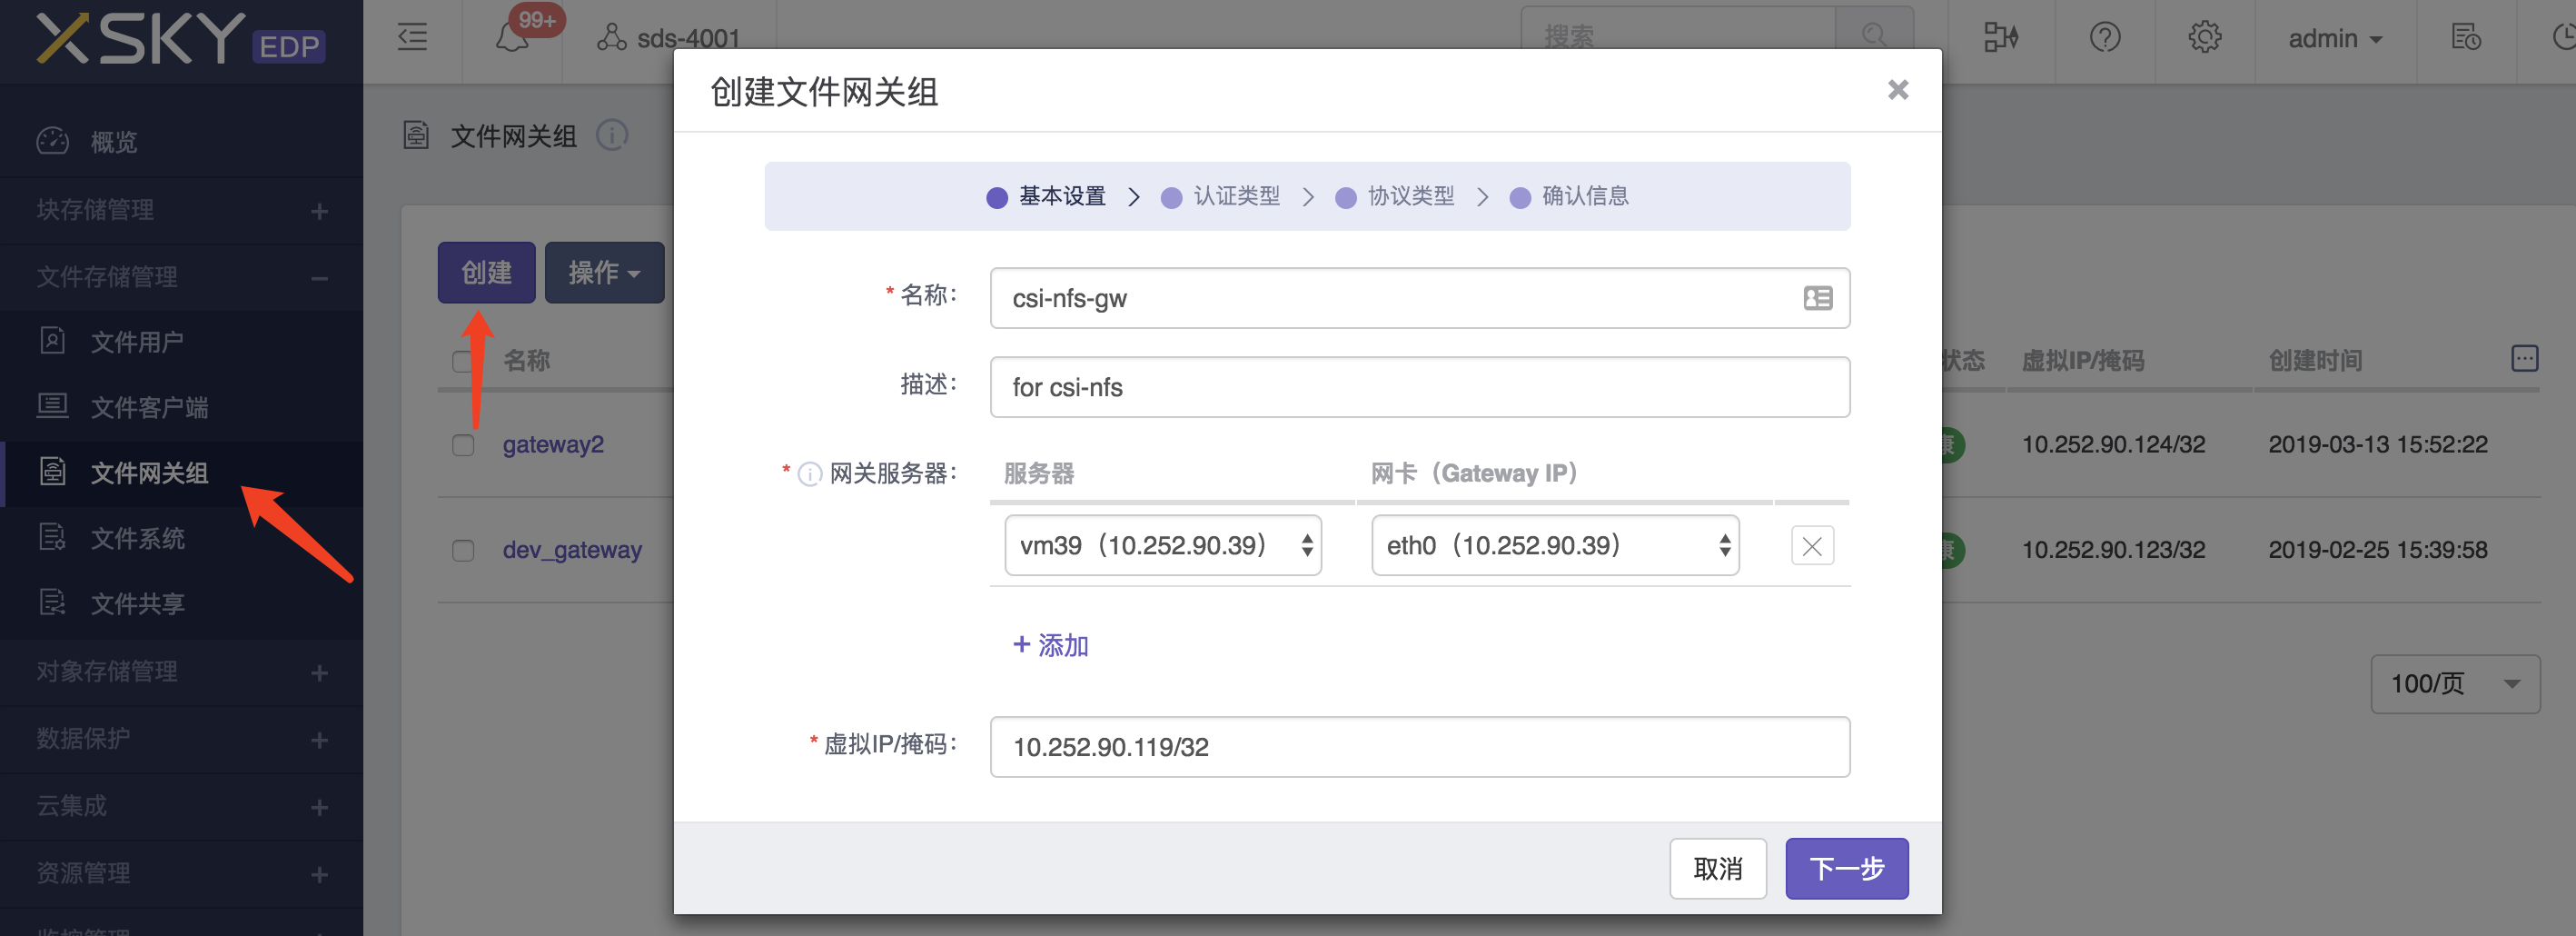


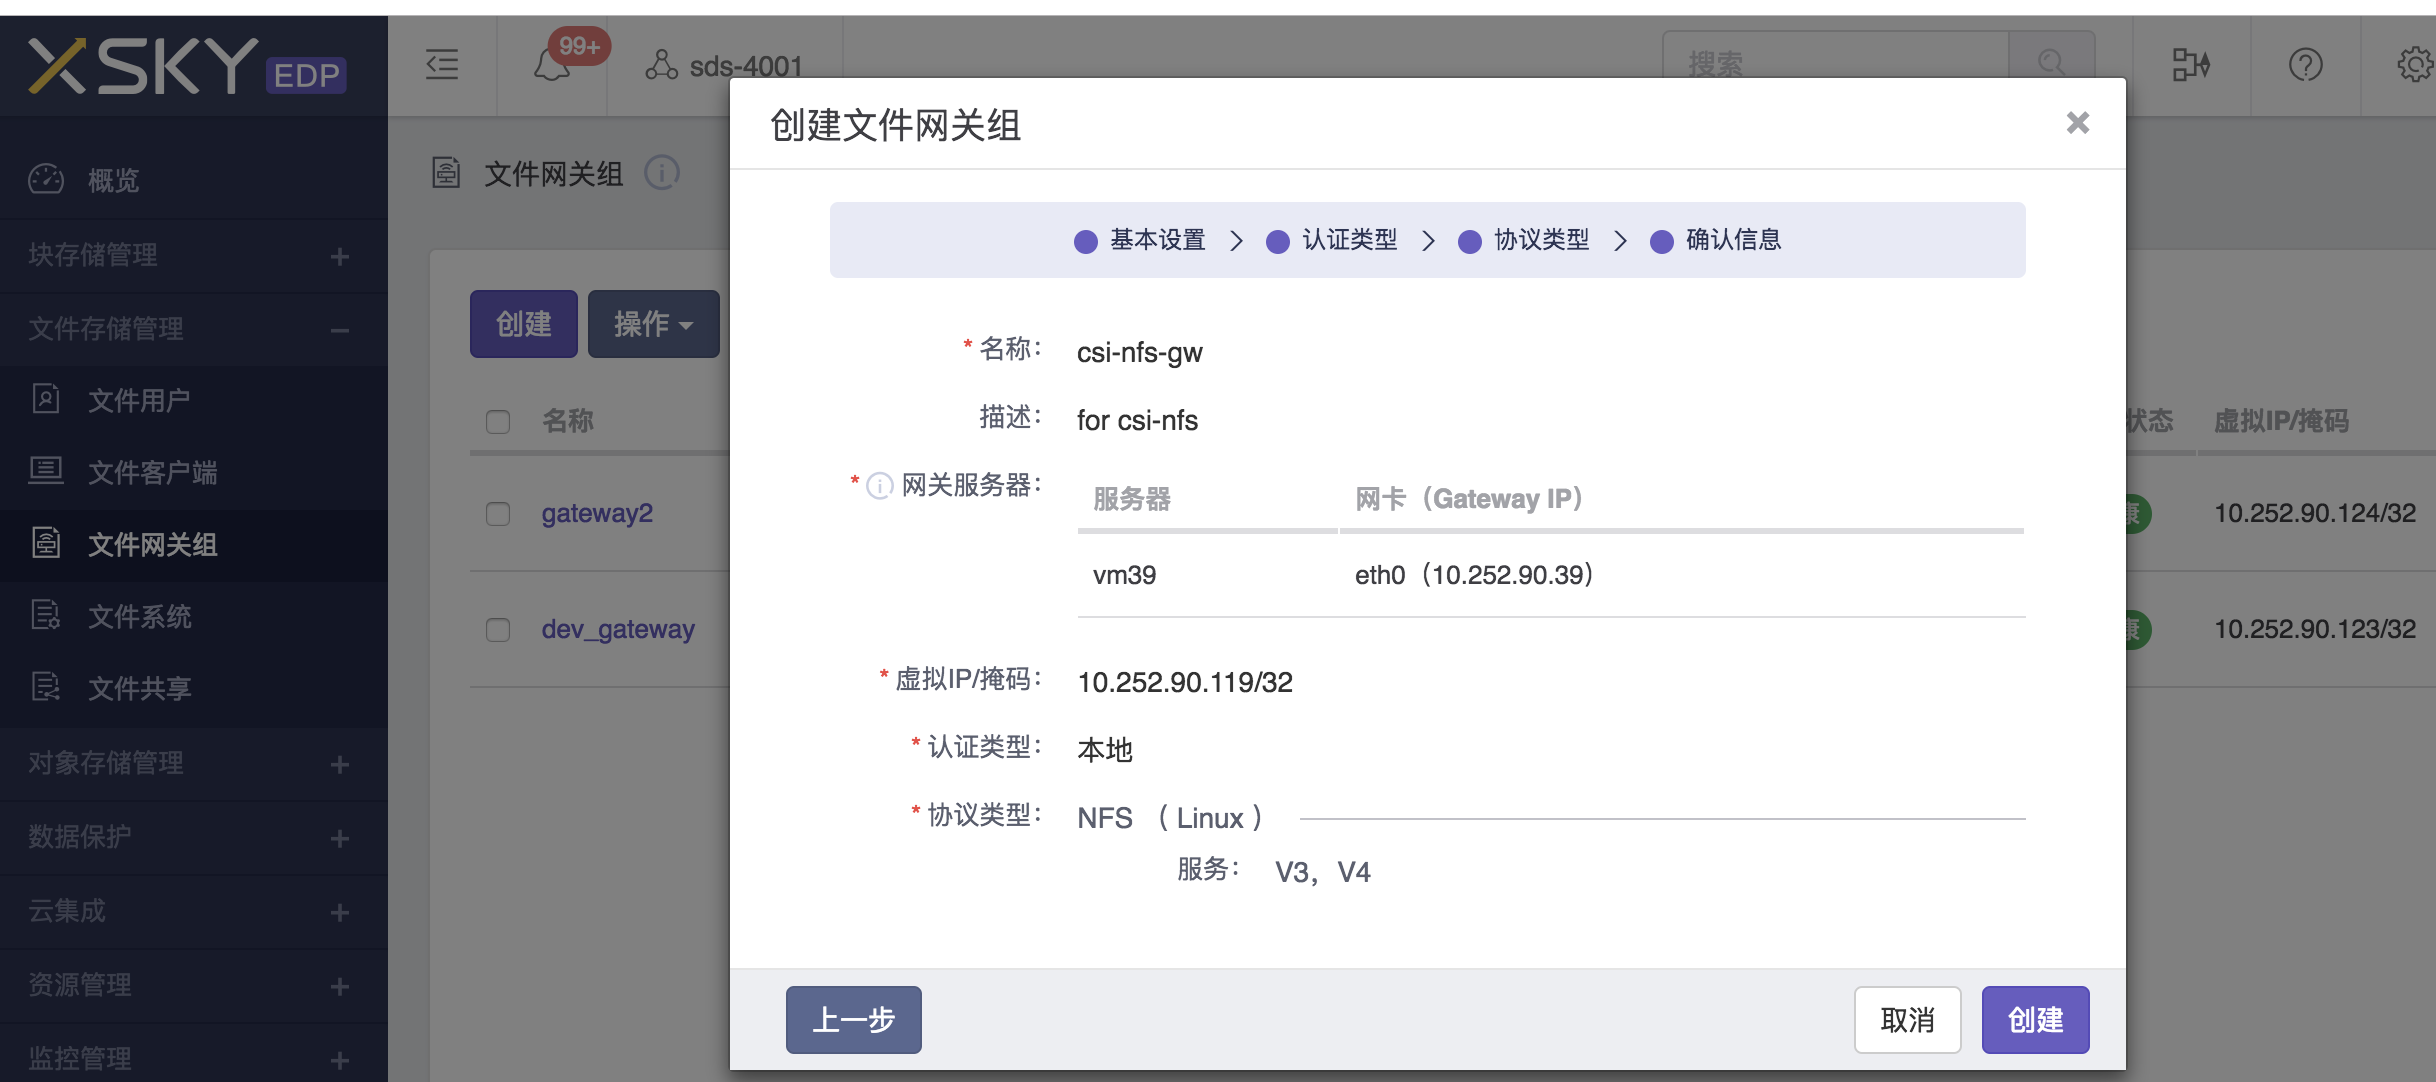
Create File System and Share
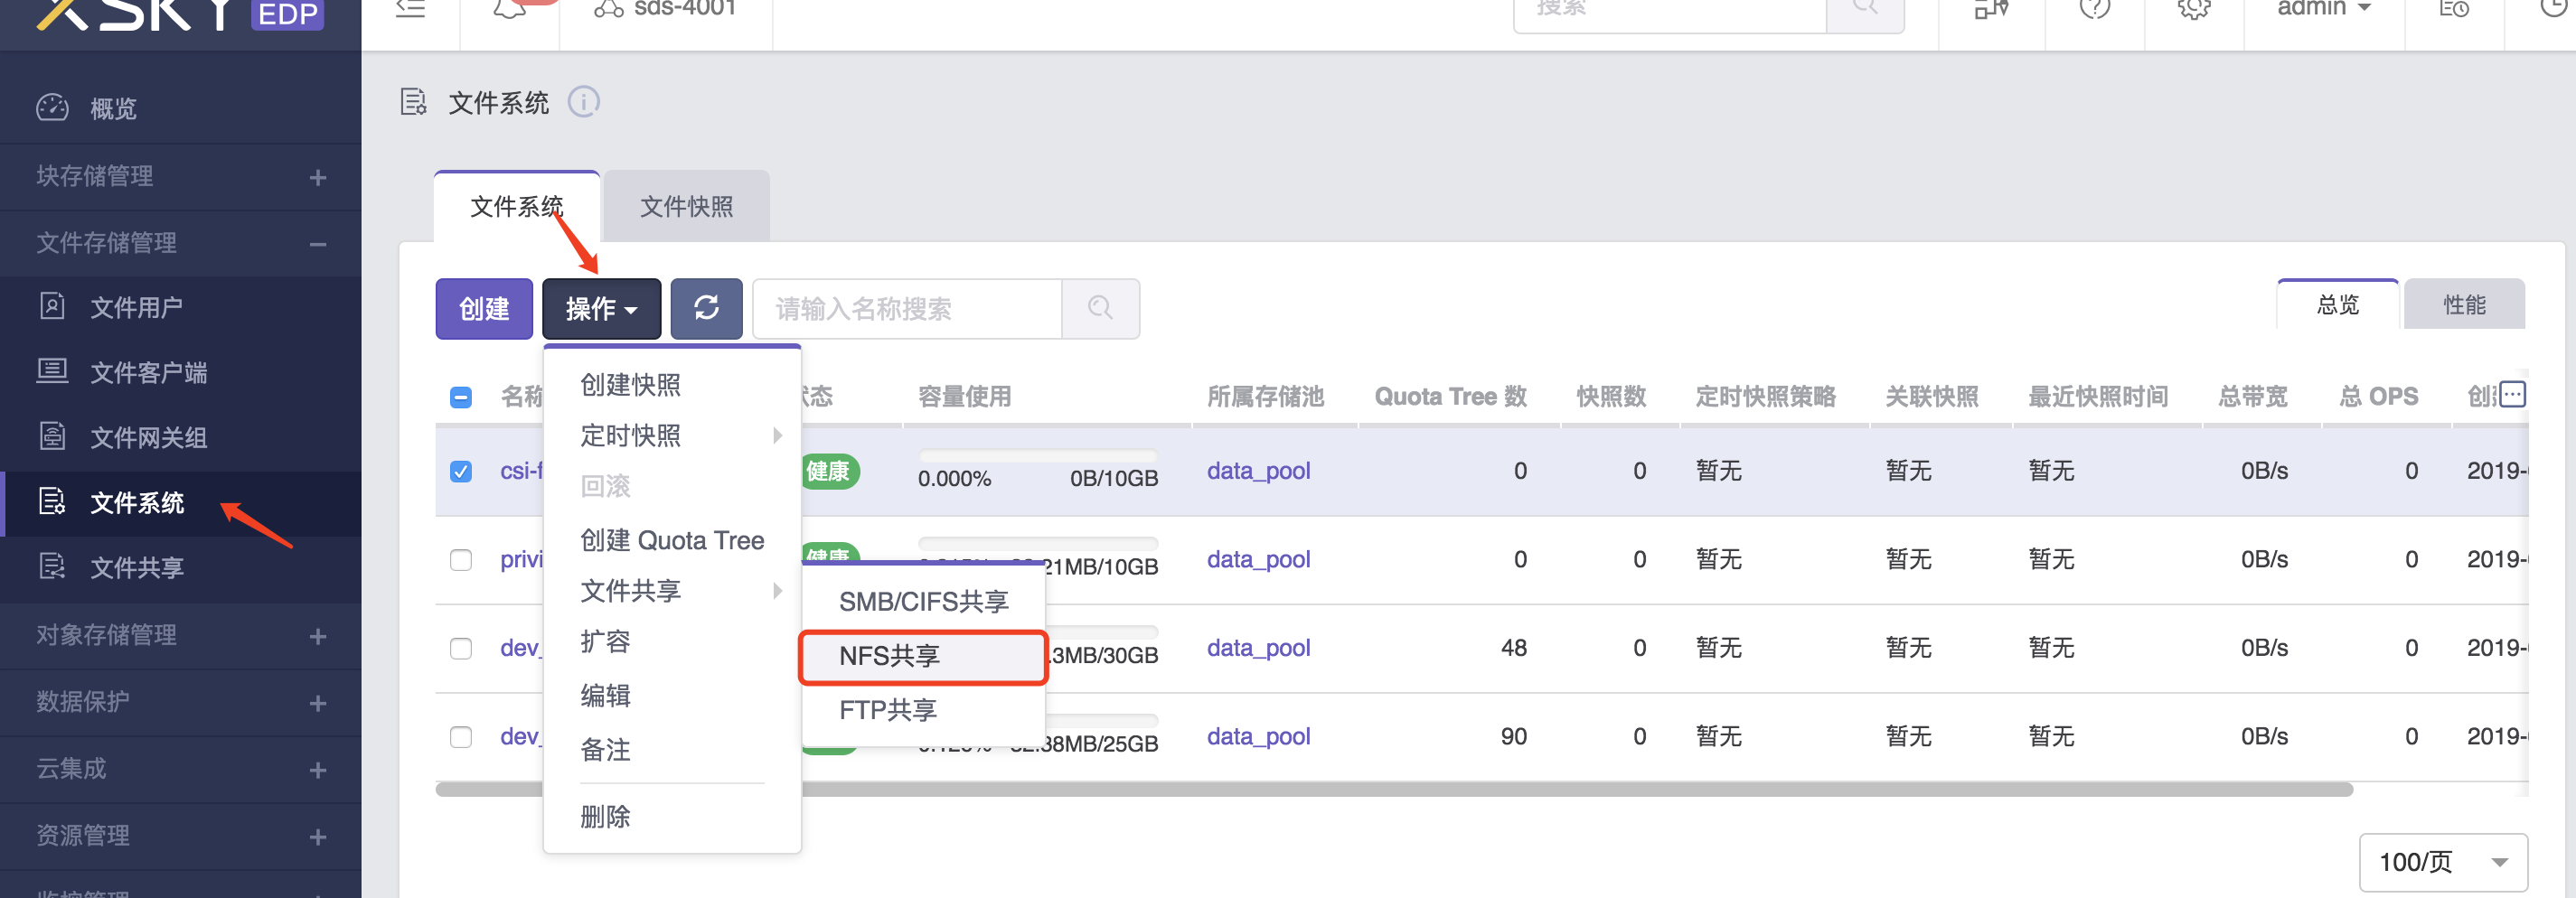
create file system

share it
Add Client Group To Share And Enable k8s Visiting
a. For priviate share
b. For public share
Now your home share should looks like:

The home share will be used to provision volume
Using
Edit yaml for StorageClass
sample(storageclass.yaml)
apiVersion: storage.k8s.io/v1
kind: StorageClass
metadata:
   name: csi-nfs-sc
provisioner: com.nfs.csi.xsky
parameters:
    xmsServers: 10.252.90.39,10.252.90.40
    user: admin
    password: admin
    shares: 10.252.90.123:/sdsfs/dev_fs/,10.252.90.119:/sdsfs/csi-fs/
    clientGroupName: ""
reclaimPolicy: Delete
Explanation of StorageClass parameters
name: storageclass name
provisioner: sidecar csi-provisioner
xmsServers: SDS manager entry, use to connent XMS API,separated by comma
user: SDS user name
password: SDS secret
shares: home share, seperate by comma
clientGroupName: leave it empty string to indicate using public share
Creating storageclass
$ kubectl create -f storageclass.yaml
Edit yaml for PersistentVolumeClaim
sample(pvc.yaml)
apiVersion: v1
kind: PersistentVolumeClaim
metadata:
  name: csi-nfs-pvc
spec:
  accessModes:
  - ReadWriteOnce
  resources:
    requests:
      storage: 5Gi
  storageClassName: csi-nfs-sc
Explanation of pvc.yaml
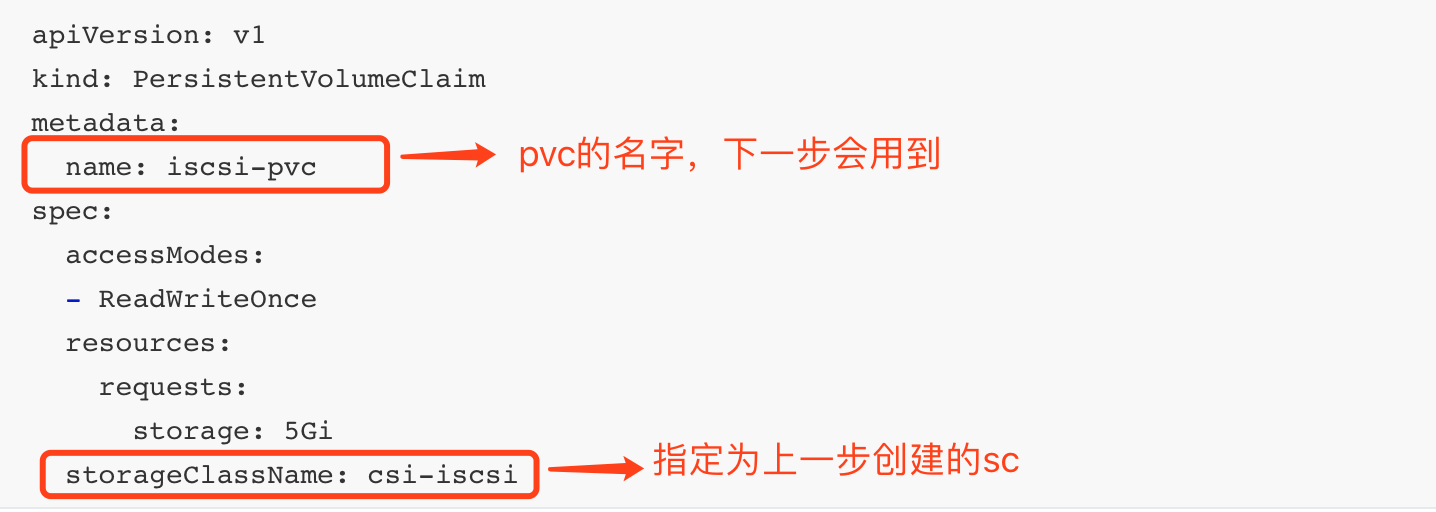
Creating pvc
$ kubectl create -f pvc.yaml
Verify
-
Run kubectl check command
$ kebectl get pvc
-
Check at SDS dashboard

It will create quota tree under home share path
Edit yaml for pod
sample(pod.yaml)
apiVersion: v1
kind: Pod
metadata:
  name: csi-nfs-demopod
spec:
  containers:
   - name: web-server
     image: nginx
     volumeMounts:
       - name: mypvc
         mountPath: /var/lib/www/html
  volumes:
   - name: mypvc
     persistentVolumeClaim:
       claimName: csi-nfs-pvc
       readOnly: false
Explanation of pod.yaml
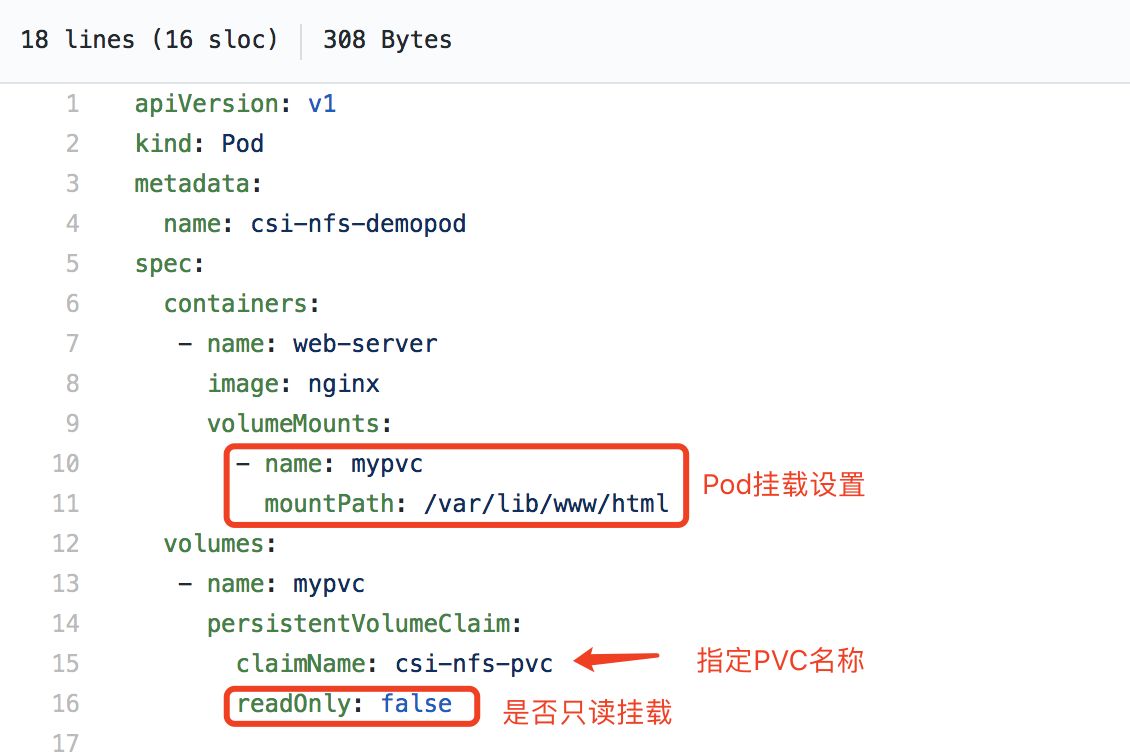
Creating pod
$ kubectl create -f pod.yaml
Verify
-
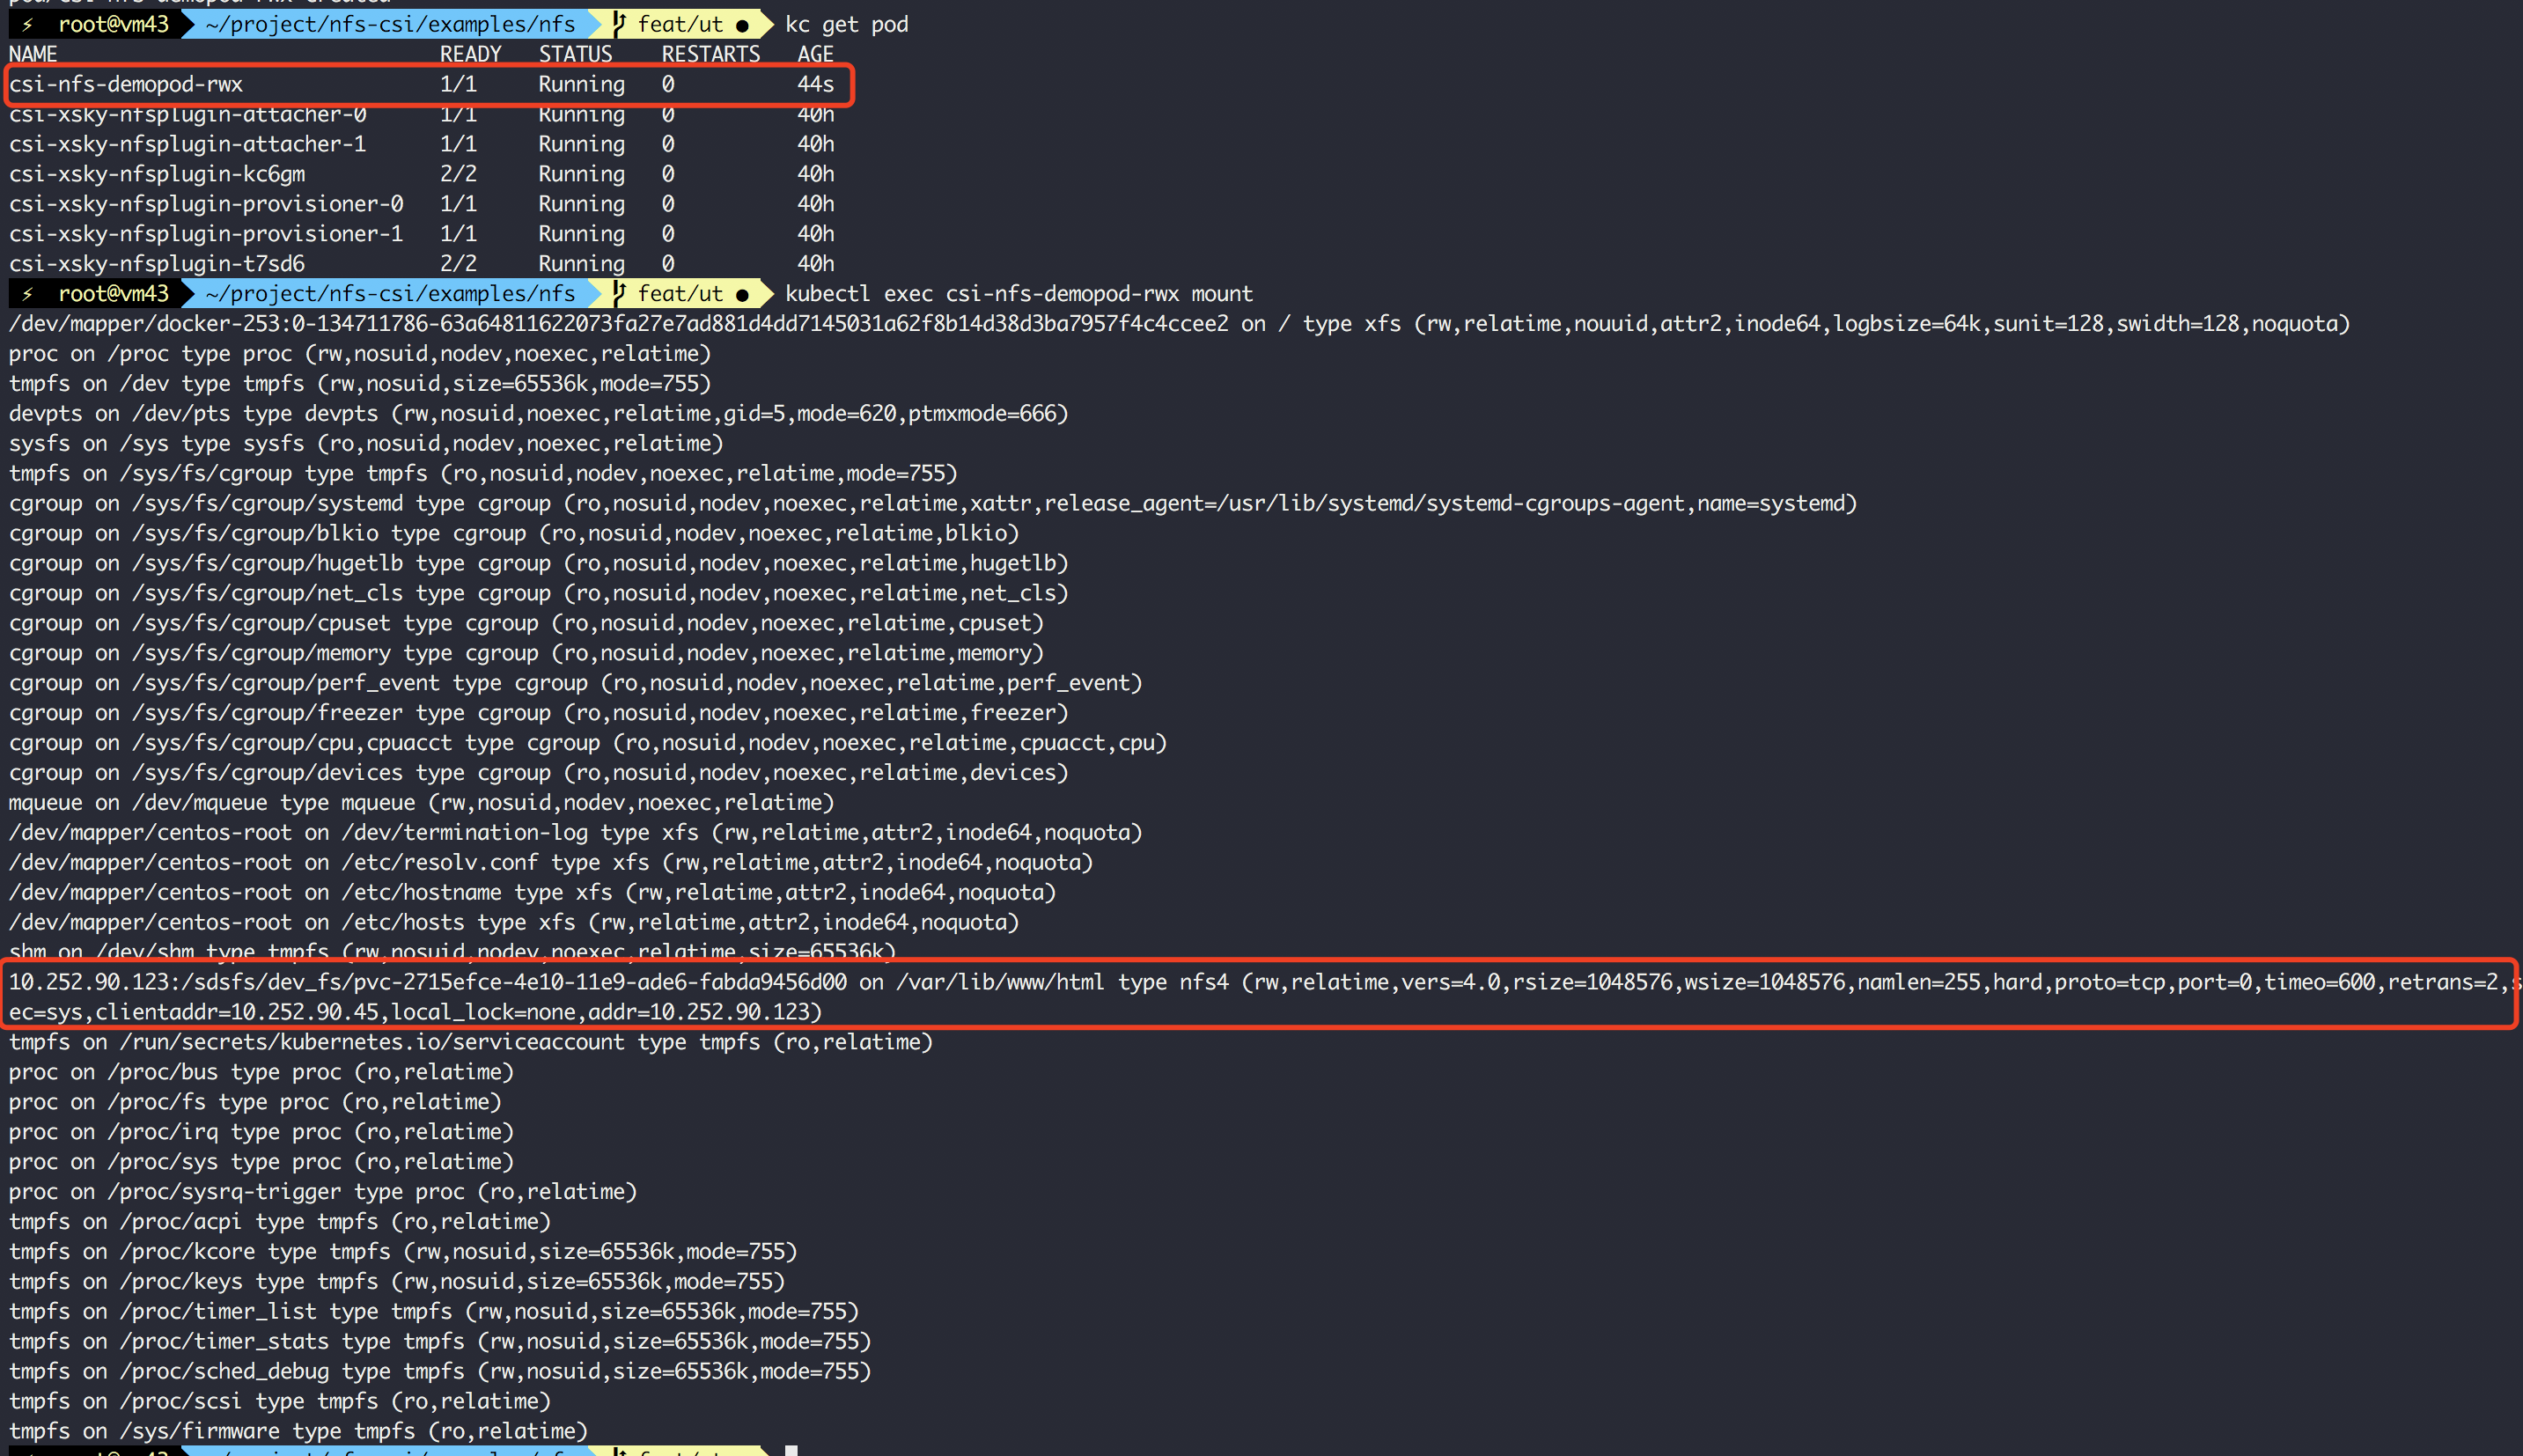
Run kubectl command to get pod
$ kubectl get pod -o wide