XSKY CSI plugin for Block Storage 1.0.0
Overview
XSKY CSI plugins implement interfaces of CSI. It allows dynamically provisioning XSKY volumes and attaching them to workloads. Current implementation of XSKY CSI plugins was tested in Kubernetes environment (requires Kubernetes 1.11+), but the code does not rely on any Kubernetes specific calls (WIP to make it k8s agnostic) and should be able to run with any CSI enabled CO.
Purpose of this article
Provide more details about configuration and deployment of Xsky Block Storage driver Introduce usage of Xsky Block Storage driver. see examples below.
Before to go, you should have installed XSKY SDS
You can get latest version of XSKY CSI driver at docker hub by running docker pull xskydriver/csi-iscsi
Deployment
In this section,you will learn how to deploy the CSI driver and some necessary sidecar containers
Prepare cluster
| Cluster | version |
|---|---|
| Kubernetes | 1.13 + |
| XSKY SDS | 4.0+ |
Deploy CSI plugins
Install dependencies
Note:install these utils for all kubernetes node
yum install binutils iscsi-initiator-utils kmod-xfs xfsprogs
yum install sg3_utils-devel.x86_64 sg3_utils-libs.x86_64 sg3_utils.x86_64
Plugins
Get yaml file
Get yaml file from below links:
- csi-attacher-rbac.yaml
- csi-nodeplugin-rbac.yaml
- csi-provisioner-rbac.yaml
- csi-xsky-iscsiplugin-attacher.yaml
- csi-xsky-iscsiplugin-provisioner.yaml
- csi-xsky-iscsiplugin.yaml
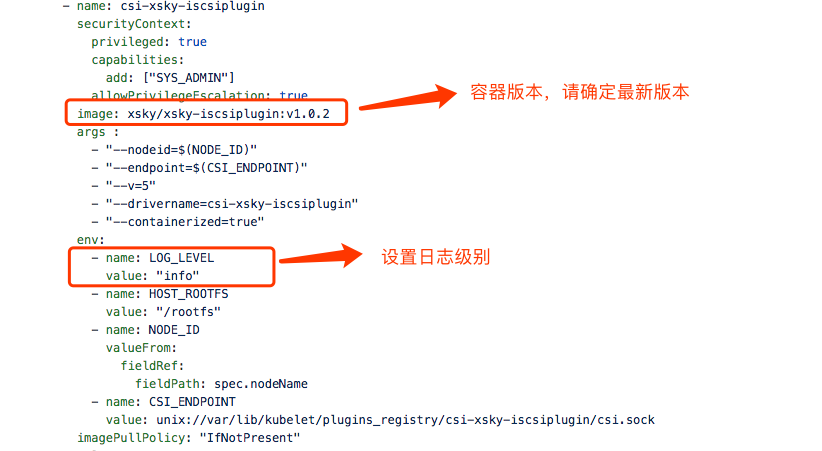
Basic remark of iSCSI CSI driver configuration(csi-xsky-iscsiplugin.yaml)
Usually, you dotn’t need to alter any configurations we provided , but you can still modify this yaml to setup the driver for some situation.
deploy sidecar(Helper container)& node plugin
-
Create RABCs for sidecar container and node plugins:
$ kubectl create -f csi-attacher-rbac.yaml $ kubectl create -f csi-provisioner-rbac.yaml $ kubectl create -f csi-nodeplugin-rbac.yaml -
Deploy CSI sidecar container:
$ kubectl create -f csi-xsky-iscsiplugin-attacher.yaml $ kubectl create -f csi-xsky-iscsiplugin-provisioner.yaml -
Deoloy iSCSI CSI driver:
$ kubectl create -f csi-xsky-iscsiplugin.yaml -
To verfify:
$ kubectl get all

Congratulation to you, you have just finished the deployment. Now you can use them to provisioning XSKY block volume .
Usage
In this section,you will learn how to dynamic provision block volume with XSKY CSI driver. Here will Assumes that you have installed XSKY SDS Cluster.
Preparation
To continue,make sure you have finish the Deployment part.
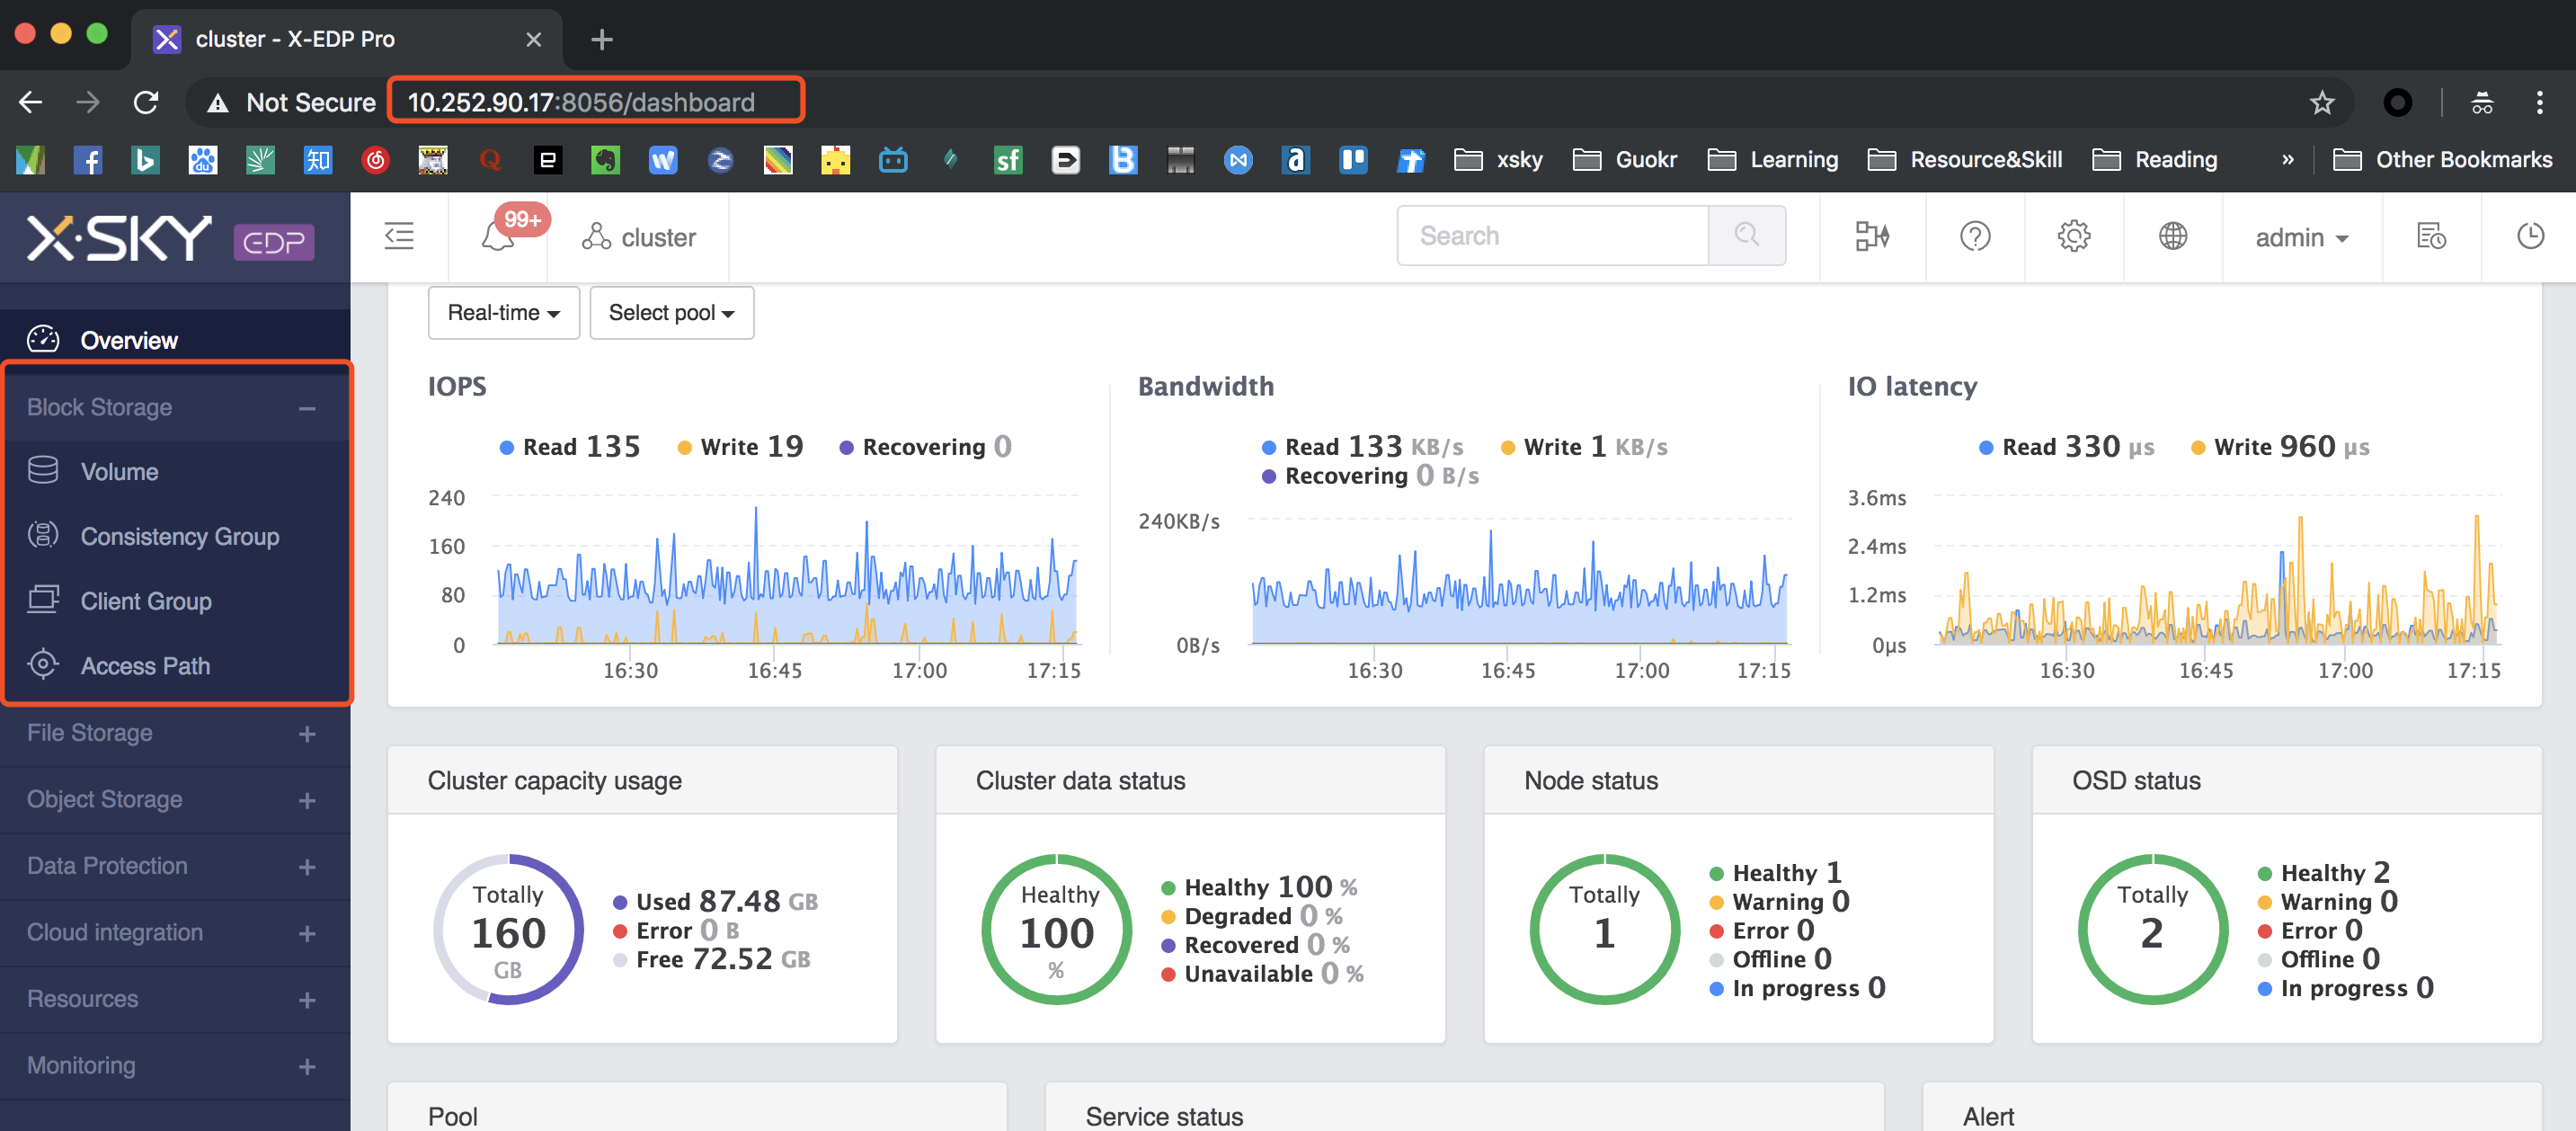
Login to you SDS dashboard, your dashboard address should be http://your_domain.com/8056
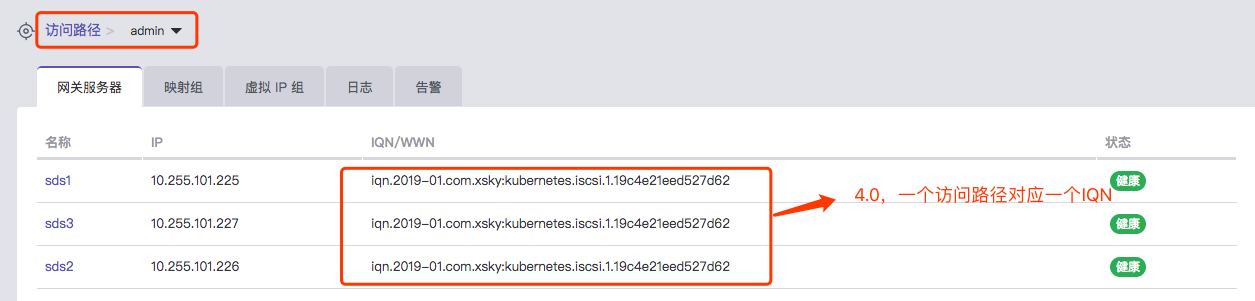
Access path & vip groups
Creating access path,Loading gateway server
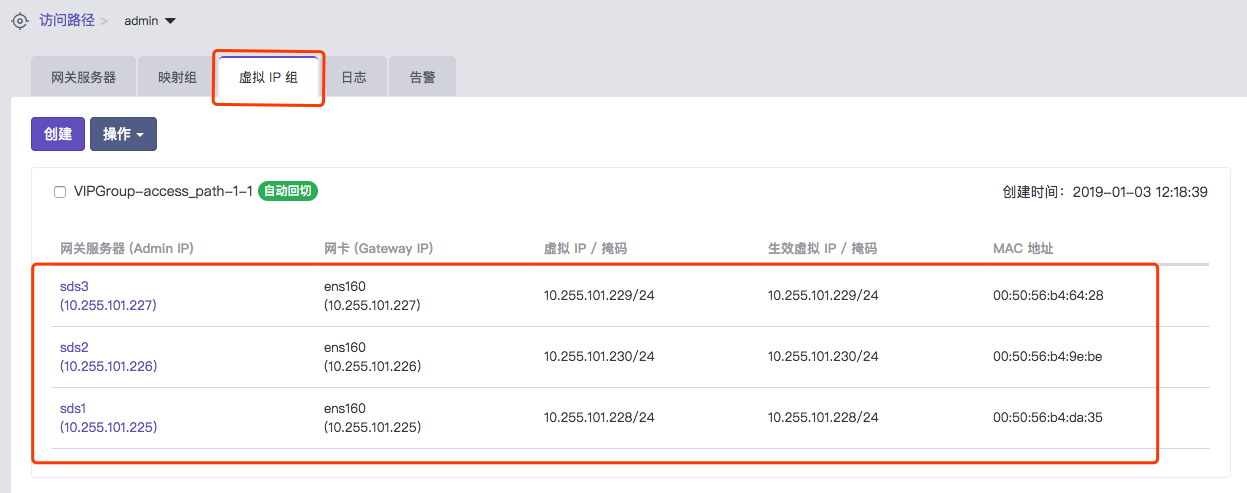
Config virtual IP group
Usage
Edit yaml for StorageClass
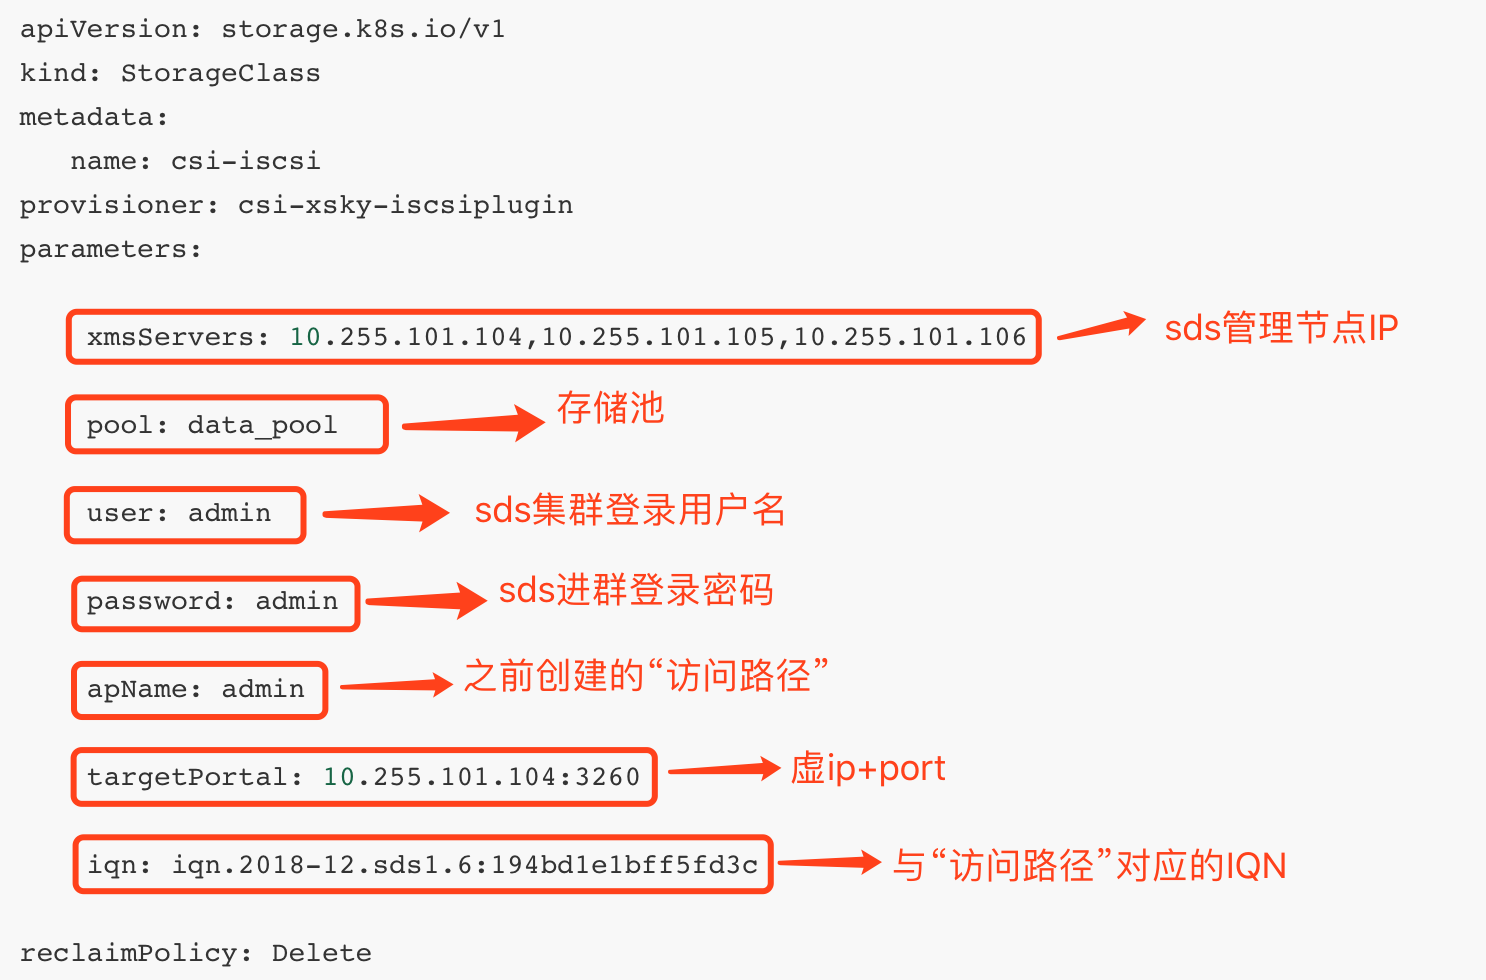
sample(storageclass.yaml)
apiVersion: storage.k8s.io/v1
kind: StorageClass
metadata:
   name: csi-iscsi
provisioner: csi-xsky-iscsiplugin
parameters:

    xmsServers: 10.255.101.104,10.255.101.105,10.255.101.106

    pool: data_pool

    user: admin

    password: admin

    apName: admin

    targetPortal: 10.255.101.104:3260

    iqn: iqn.2018-12.sds1.6:194bd1e1bff5fd3c

reclaimPolicy: Delete
Explanation of StorageClass parameters
Creating storageclass
$ kubectl create -f storageclass.yaml
Edit yaml for PersistentVolumeClaim
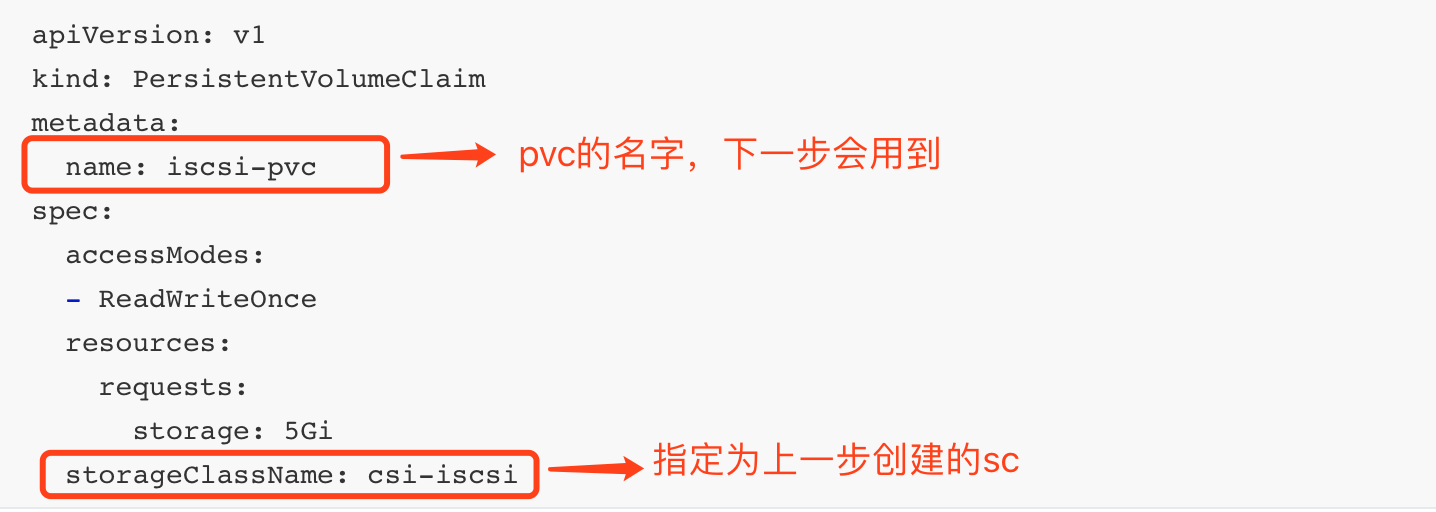
sample(pvc.yaml)
apiVersion: v1
kind: PersistentVolumeClaim
metadata:
  name: iscsi-pvc
spec:
  accessModes:
  - ReadWriteOnce
  resources:
    requests:
      storage: 5Gi
  storageClassName: csi-iscsi
Explanation of pvc.yaml
Creating pvc
$ kubectl create -f pvc.yaml
Verify
-
Run kubectl check command
$ kebectl get pvc
-
Check at SDS dashboard

Edit yaml for pod
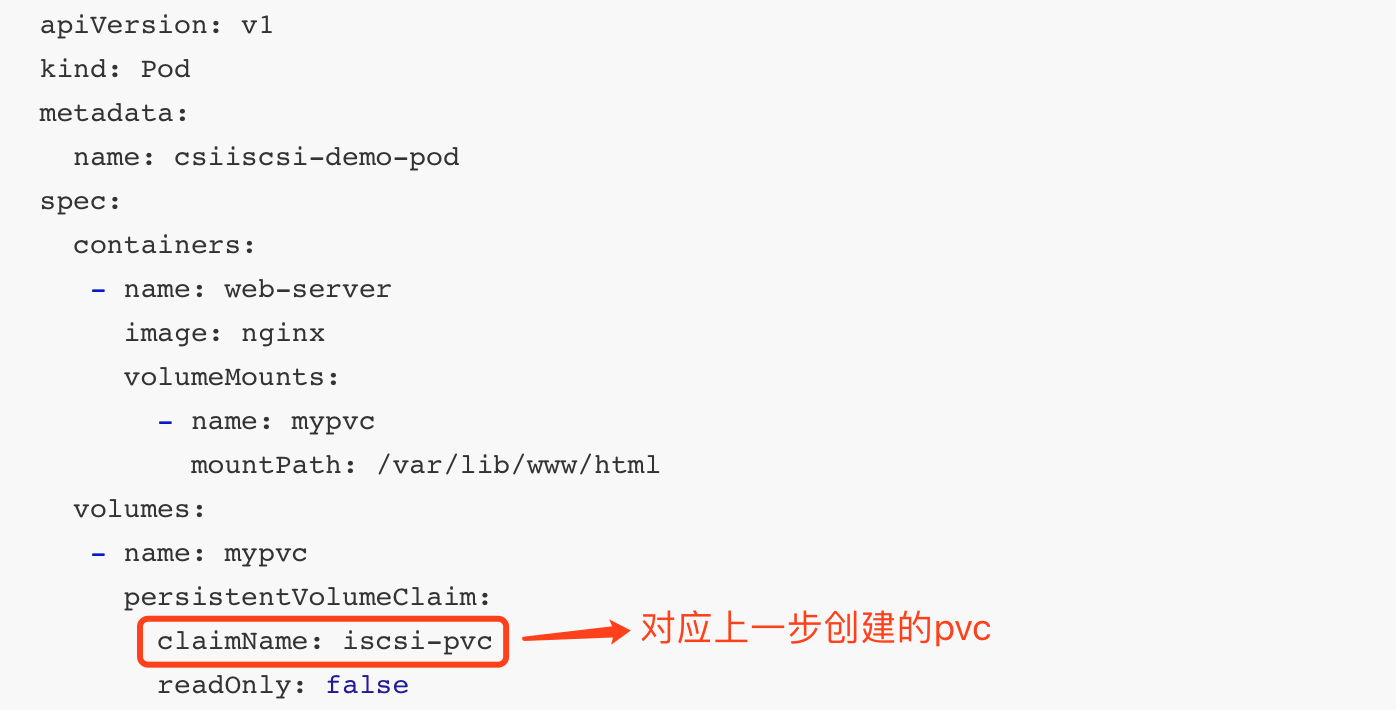
sample(pod.yaml)
apiVersion: v1
kind: Pod
metadata:
  name: csiiscsi-demo-pod
spec:
  containers:
   - name: web-server
     image: nginx
     volumeMounts:
       - name: mypvc
         mountPath: /var/lib/www/html
  volumes:
   - name: mypvc
     persistentVolumeClaim:
       claimName: iscsi-pvc
       readOnly: false
Explanation of pod.yaml
Creating pod
$ kubectl create -f pod.yaml
Verify
-
Run kubectl command to get pod
$ kubectl get pods | grep csiiscsi-demo-pod -o wide
-
Check the container at the node where this pod was scheduled
